How to Remove Old, Cracked and Brittle PPF Without Damaging Your Car's Paint
A professional step-by-step guide to safely removing aged paint protection film — and why the film you choose today determines how easy tomorrow's removal will be.

Proper heat application and controlled peel angle are the two most critical factors in damage-free PPF removal.
Paint Protection Film eventually reaches the end of its service life. Whether it's yellowed, cracked, delaminated or simply aged past the point of doing its job, there comes a time when PPF must come off. And if it's not removed carefully, the process itself can inflict the kind of damage the film was there to prevent.
This guide walks through professional-grade removal technique — the kind used by trained applicators, not the kind that ends with a body shop estimate. More importantly, it explains why the film you install today has a direct bearing on how straightforward that future removal will be.
Why Old PPF Becomes Difficult to Remove
Fresh PPF typically peels away cleanly, especially when it has been installed with a quality pressure-sensitive adhesive. The same film five or seven years later is a different story. Ultraviolet exposure, thermal cycling and surface oxidation all change the adhesive chemistry. What started as a clean-peeling layer can bond almost permanently to the paint surface.
There are three common failure modes, each requiring a slightly different approach:
Surface Brittleness
The topcoat of the film has hardened and cracked from UV exposure. The film fractures into small pieces when pulled rather than peeling in long strips. Slow, patient heat application is the only solution.
Adhesive Transfer
The film's carrier layer peels away but leaves its adhesive bonded to the paint. Often seen with lower-quality films or those past their rated life. Requires a dedicated adhesive remover and patience.
Staining / Yellowing
A discoloured film may have also transferred compounds into the clear coat. Removal will expose staining that requires a light polish to correct — this is normal and manageable.
Edge Lifting
Edges that have begun to peel back are entry points for moisture and contaminants. These sections often have compromised adhesive and may be easier to start — but don't pull cold or you risk tearing.
Tools and Materials You'll Need
Having the right tools before you start is not optional — improvising mid-removal with the wrong equipment is how paint gets scratched. Assemble everything before you begin.
Heat gun (variable temperature, 1,500–2,000W) · Infrared thermometer · Plastic pry tools and trim removal tabs · IPA solution (70% isopropyl) · Adhesive remover (citrus-based preferred) · Microfibre cloths (dedicated, lint-free) · Nitrile gloves · Detailing tape to protect adjacent panels
Steam can force moisture under lifted edges and onto bare metal at panel seams. Use a heat gun with a controllable, directional nozzle instead. Steam is useful after removal for residue, but not during peel.
One tool that separates professional work from DIY damage: a quality infrared thermometer. Surface temperature tells you when the adhesive has reached working temperature. Guessing is how you either pull cold (tearing the film into fragments) or overheat the panel (softening the clear coat).
Step-by-Step Removal Process
Work one panel at a time. Attempting to remove multiple large sections simultaneously leads to areas cooling down before you can work them — the most common cause of tearing and adhesive transfer.
-
1
Wash and degrease the panel
Remove all surface dirt, wax and contamination. Any grit trapped between the film and paint during removal will cause micro-scratches. A clean surface also allows you to see film edges clearly.
-
2
Identify your starting edge
Look for a corner or edge where the film terminates — bonnet leading edge, door jamb, or any pre-existing lifted section. Avoid starting in the centre of a large panel where there is no free edge to grip.
-
3
Heat a working section (20–25 cm)
Hold the heat gun 8–10 cm from the surface, moving in slow, overlapping passes. Target 60–70°C on the film surface. The film will visibly change texture slightly — it becomes more pliable and loses its brittleness.
-
4
Begin peeling at a low angle
Use a plastic trim tab to lift the edge — never a metal tool directly on paint. Once you have a tab to hold, peel back at 15–20° to the panel surface, not straight up. The low angle keeps the adhesive layer under tension rather than shearing it.
-
5
Reheat continuously as you advance
Keep the heat gun just ahead of the peel front. The moment the film cools, stop and reheat before continuing. Speed is the enemy here — slow and steady prevents 90% of adhesive transfer.
-
6
Remove adhesive residue immediately
While the panel is still warm, wipe adhesive residue with an IPA-dampened microfibre cloth. Warm adhesive is much easier to remove than cooled, cured residue. Move immediately to the residue section if full removal is needed.
Dealing With Stubborn Adhesive Residue
Even with perfect technique, some adhesive will remain on the paint surface after the film is gone. This is normal and fully removable without damage — the key is using the right chemistry rather than mechanical force.
Work through this process in sequence — move to the next step only if the previous one hasn't fully cleared the residue:
-
1
Warm IPA wipe
Heat the panel gently to 40–50°C and wipe with 70% IPA on a fresh microfibre. Sufficient for residue from films removed recently and cleanly. Use light pressure — no scrubbing.
-
2
Citrus-based adhesive remover
Apply to a microfibre, lay the cloth on the residue and allow 2–3 minutes dwell time before wiping. Do not spread aggressively — let the solvent do the work. Multiple applications are safer than a single aggressive pass.
-
3
Panel wipe and inspection under lighting
After each treatment, wipe clean with IPA and inspect under raking light or a detailing lamp. Residue will appear as a slight sheen or tackiness. Verify the panel is fully clear before moving on.
-
4
Dedicated PPF adhesive gel (for stubborn cases)
When standard solvents haven't cleared the residue after two passes, a purpose-made adhesive separation gel such as Keramik PPF X is the professional's next step. Apply the gel directly over the residue, cover with plastic wrap to prevent evaporation, leave for 10–20 minutes, then wipe away. The gel targets the adhesive polymer specifically without attacking the clear coat below.
Adhesive residue is softer than paint. Any mechanical scraping — with a blade, a clay bar used aggressively, or abrasive compound — risks permanent scratching. Solvents and patience are the only appropriate tools at this stage.
Common Mistakes and How to Avoid Them
Most DIY PPF removal damage falls into a handful of predictable categories. Understanding them in advance is the simplest form of prevention.
Pulling cold film. If the film tears into small pieces, you're working too cold. Stop, reheat, and wait for the adhesive to soften before continuing.
Overheating the panel. Sustained heat above 80°C can soften clear coat. Keep moving the gun and monitor with the IR thermometer.
Using metal tools near paint. Plastic trim tabs only. Even a wrapped metal tool at the wrong angle will scratch the clear coat.
Letting residue cure. Adhesive removed within an hour of film peeling takes a fraction of the effort of residue left overnight.
Rushing edges and trims. Film bonded into door gaps and around headlights requires extra care. Use a plastic pick and apply heat in very short bursts.
Skipping the decontamination wash. Removing film over a dirty panel grinds surface grit into the paint. Always wash first.
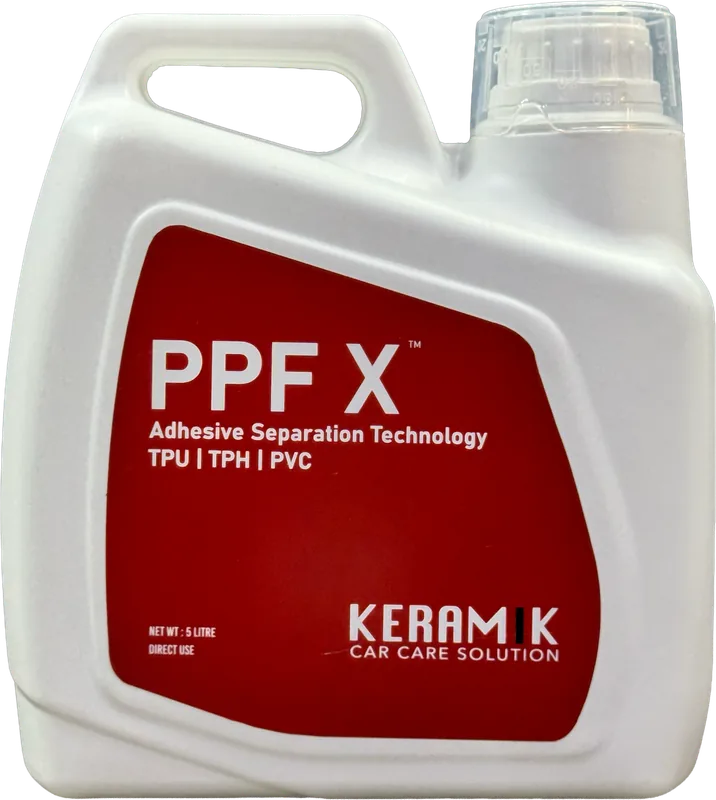
A professional-grade, high-viscosity gel engineered to safely remove aged, damaged, brittle or poorly installed Paint Protection Films. Works on TPU, TPH and PVC films. Supplied through Keramik Car Care's authorised trade network.
Paint Correction After Removal
Once the film and all residue are gone, inspect the exposed paint under good lighting. Long-term PPF — especially on high-UV areas like bonnets and mirrors — will often reveal paint that looks slightly different from adjacent unprotected surfaces.
Micro-marring from the original installation · Slight oxidation at unprotected edges · Colour difference where film blocked UV fade · Isolated scratches from edge lifting · Swirl marks if the car was machine-washed with film in place
None of these are permanent. A single-stage machine polish using a foam pad and a light finishing compound will address all of the above without removing significant clear coat. Follow with a paint sealant or ceramic coating before applying new PPF, so the film bond is to a stable, protected surface.
Choosing Film That's Easy to Remove Later — and the Tool That Helps When It Isn't
The single most effective thing you can do to make future removal easier is choose the right film now. Every difficult removal this guide describes traces back to the same root causes: inferior adhesive chemistry, film that yellows and hardens, and products not engineered for longevity. But even the best film on the worst day can leave adhesive that heat alone won't shift — and that's where a dedicated gel remover earns its place in the workshop.
Professional installers specify film on three removal-relevant criteria alongside its protective performance:
- Adhesive formulation — clean-release pressure-sensitive adhesive that doesn't chemically bond to the clear coat over time.
- UV stability of the topcoat — a film that resists yellowing stays flexible longer, which directly preserves peel-ability at end of life.
- Cast vs calendered TPU — cast films maintain dimensional stability through thermal cycling; calendered films can shrink and lock edges in place.
And when the time comes to remove even the best-installed film, Keramik PPF X gel makes the process significantly cleaner. Its Adhesive Separation Technology penetrates the bond between old adhesive and clear coat, so the film lifts without leaving the stubborn residue that heat alone cannot shift. Professional installers keep it on the shelf not just for removals but as the last step when a film lifts at an edge and the adhesive needs coaxing out. More information is available through Keramik Car Care's authorised trade channel at keramikcarcare.com.
A professional-grade gel remover for aged, brittle and difficult PPF. Formulated to dissolve the adhesive bond between old film and clear coat — not the clear coat itself. Keramik Car Care operates exclusively on a B2B trade basis. PPF X is supplied through authorised professional channels to workshops and certified installers across India.
Visit Keramik Car Care →

